Hi Everyone
Sue here
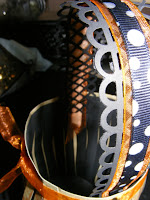
Well its here again. Hope you have all your chocolate and sweets at the ready! The above is a little basket to put them all in on your travels around the houses........
Halloween Basket
This project was inspired by a layout I saw by Kianel. It is really easy to do and only needs 2, 12 x 12 pieces of card. Make sure it is of a good thickness.
What you will need:
1 x 12 x 12 black cardstock
1 x 12 x 12 patterned cardstock
Ribbon
Embellishments
Distress inks, paintbrush, stamps (I used a Penny Black Halloween stamp)
Spellbinders classic circle, 2010 snowflake and Persian accents
Step 1
Cut 2 pieces of 15 x 15cm squares in black cardstock. Score at 0.5cm from top and 2cm from bottom of card. Put double sided tape back and front of the bottom of the card. Cut a fringe in the card at 1cm intervals

Step 2
Step 3
Repeat step 1 with the coloured cardstock, but cut the 2cm off the bottom. Put double sided tape on the back of your card on the top and bottom. Stick the top of your patterned card level with the black card, then stick the each strand to the bottom of the basket. This is your finished structure. Die cut a patterned circle and stick underneath the structure.
Step 4
Use an edging punch or spellbinder to die cut a decorative strip, enough to go around the bottom of the basket. Use ribbon to go around the top of the basket
Cut a strip of black cardstock to build your handle. Use your punches to decorate edges and embellish with ribbon. Affix to the basket with a brad.
Stamp out your images and colour with distress inks as watercolour paints, then highlight parts with glossy accents.
Take care, speak soon
Sue


Fantastic love it. Caroline xxx
ReplyDelete