Craftsuprint - The Worlds Largest Legal Craft Download Site!
Showing posts with label Marianne Dies. Show all posts

Thursday, 16 May 2013

May 16th - Purple for Peace

 
    It would be nice to have Peace, especially in certain parts of the world. Purple has been adopted by several peace seeking organisations.  It is also a great colour to craft with.
   This card started with a purple and mauve background made using Distress Inks and blending foam, then it was water stamped with a swirl stamp, this technique 'bleaches out' some of the colour and leaves an almost ink free image. The bird is die cut from Shimmer Sheetz which is plastic, some dies will not cut through very well but that can give you an almost embossed type image instead.
   I have also die cut some leaves, using a Joy Craft die, to make a tree in the corner and give the dove a twig to carry. I have then used the same green card to mat the picture. There are a few clear gems in the bottom right corner to add a little more shine to the card.
  This card was made using the following materials from J&C Creations:
Shimmer Sheetz - Purple Iris
Marianne Creatable - LR0149
Joy Crafts - Leaves
Distress Inks - Seedless Preserves, Shaded Lilac
Clear Gems & Swirl stamp

Monday, 13 May 2013

Kite Day 13th May - Tracey Anne

It is generally accepted that kites were first invented approximately 2800 years ago in China, Designs often emulate flying insects, birds, dragons and other beasts, both real and mythical. The finest Chinese kites are made from split bamboo (usually golden bamboo), covered with silk, and hand painted. Now days they are considered toys  common with children , rather than adults, though there is a Kite festival every year in Brighton for the big kids among us....

Here's my card , no dragons on them I'm afraid ....

Items used 

Dotty Embossed card blank
Kite Stamp
spellbinders Banners die
Pink Ribbon

All highlighted items can be found over at the J and C Creations Website ....

Thursday, 2 May 2013

Scrap Heap!

Hi Everyone
Sue here


Today I have gone through my stash and delved right to the bottom of my bits and pieces and brought out all types of metallic stuff.


I firstly took a Ranger tag and painted it with, copper, gold and white acrylic paint, then put it through an m- bossability embossing folder then took some sandpaper and sanded the top of the raised area then went over it with rusty hinge distress ink.


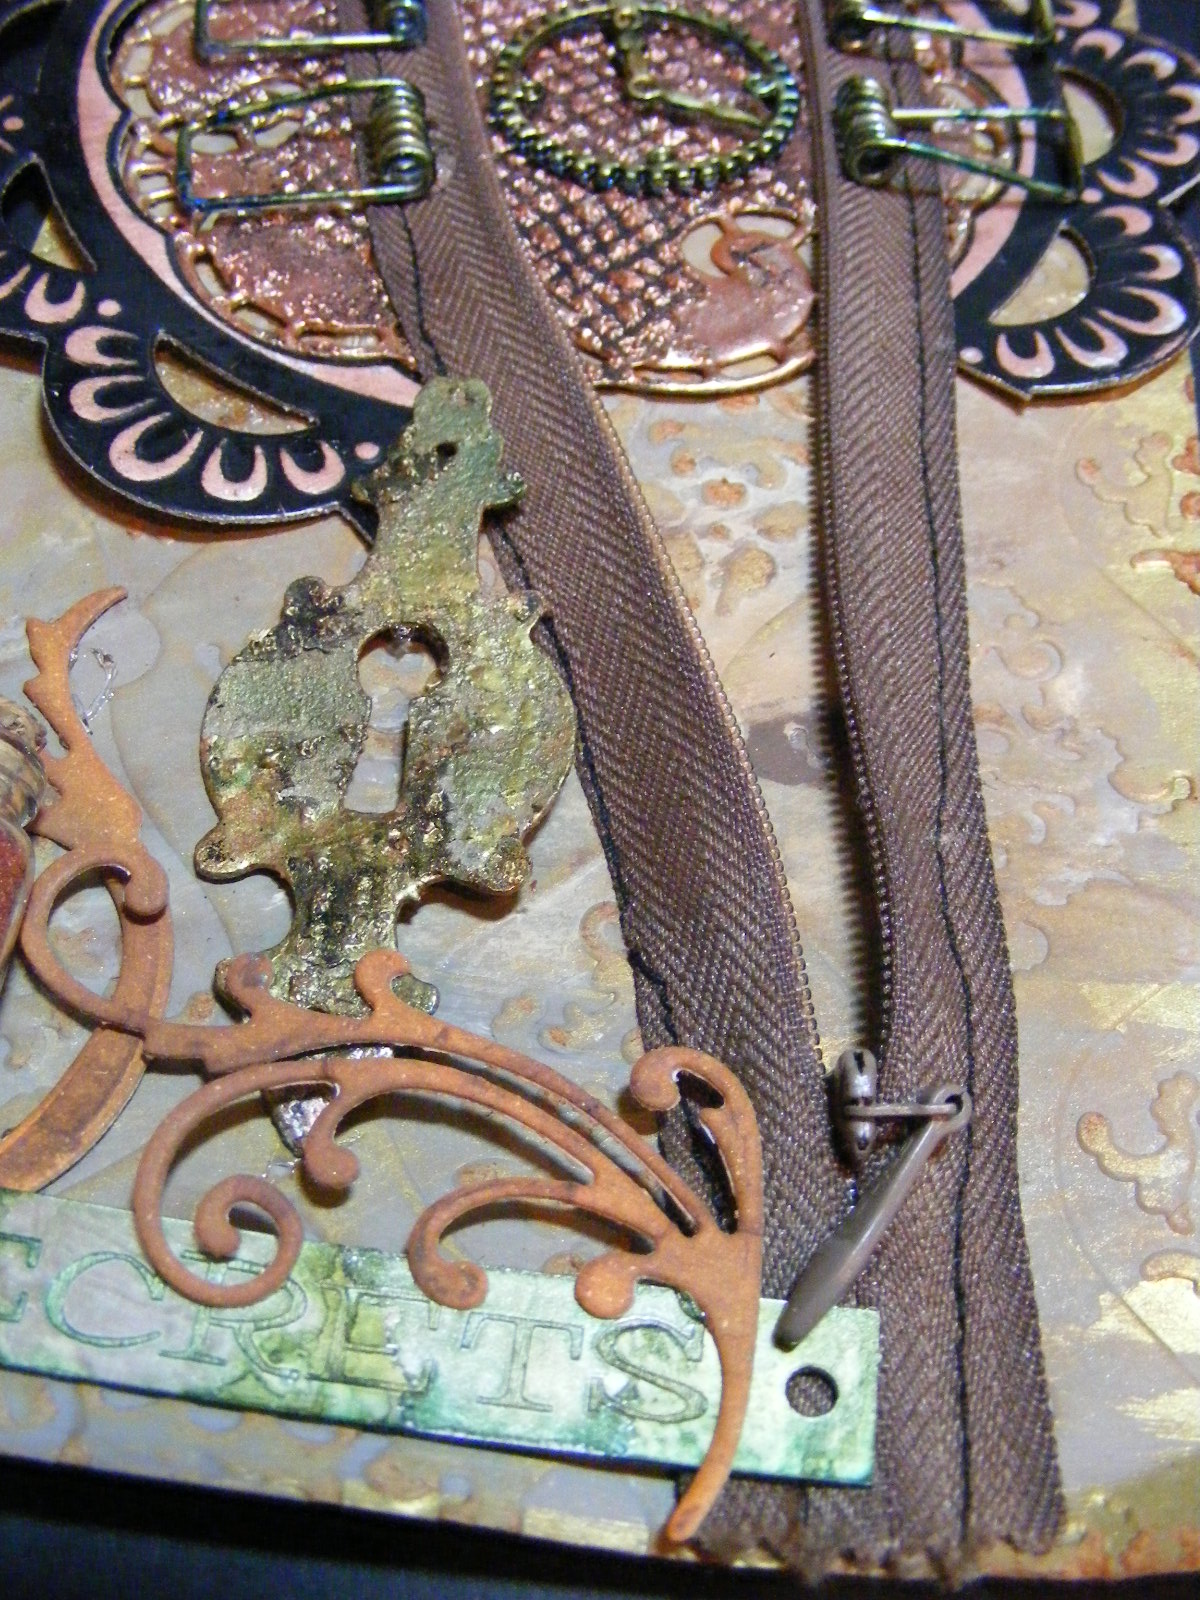
I then die cut a Dollie from the Marianne Dies Circle Frame out of a piece of Engraving Art Copper foil board.  This is usually used for scratching pictures out of but I saw Sue Wilson do this technique where after I die cut the Dollie I went over it with a piece of sandpaper and it brought off the top layer of black paint leaving the copper foil underneath exposed.  I then put Versamark on the inner circle and heat set 3 layers of brass and copper pearl WOW embossing powder. On the third layer I had already inked up the Heartfelt Creations Burlap Background stamp with Stazon black ink then whilst hot pushed the stamp into the embossing powder giving it the mottled look.

I then took an ordinary zip and stitched this over the Dollie.  I then used a small piece of grungeboard and die cut a keyhole again distressing and antiqui-fying it!  The flourished are from the circle frame set.

The bottle, and metal clock are from the website and I added into the bottle copper WOW embossing powder.  The 'SECRET' sentiment, is from my stash and inked with alcohol inks. The springs are from pegs(which keeps the two parts together)Again coloured in with alcohol inks.

Metallica eat your heart out!    

Take care.....Sue

Thursday, 11 April 2013

Windows and Wise Words

Hi Everyone
Sue Here

LOGIC WILL GET YOU FROM A TO Z IMAGINATION WILL GET YOU EVERY WHERE!
This week is 'Wise Words' and I've started off by using a Ranger Tag and art phrases from Creative Expressions.


I firstly used Distress Stains in peeled paint and evergreen bough and blobbed this all over the tag.  I then used  an embossing folder to make the indentations on the tag.  I then used black soot distress ink around the edge of the tag and to highlight the embossed area.


I then cut out the marianne craftables CR1204 oval frame and flowers cutting these out in different brown cardstock.


The background paper has been stamped on with the penny black brick wall and the flower made with the spellbinder bitsy flowers.  I then placed these behind an acetate bubble shaker pouches.  The leaves are a marianne die, and the die at the top is from the spellbinder Moroccan accents.  The words were stamped with versamark and I used WOW ebony embossing powder over the top and heat set.  The pearl brads are from J & C Creations.

Take care ....Sue


Full Tag


Sunday, 10 March 2013

To Mothers everywhere, we salute you!

Hi Everyone
Sue Here


Well to all you mums, carers and mums to be, out there, whether your pride and joy is human or animal:

Happy Mothers Day!

A Mother

A mother is more than just a woman
A mother is more than just a friend and wife
A mother may have brought you to this world
but, a loving mother brings you life

A mother is one with love and honour
A mother comforts you day and night
A mother; a new one every hour
A mother teaches wrong from right

A mother knows when you are worried
A mother knows when you are joyed
A mother knows when you are sorry
A mother knows just what's inside

A mother gives you love forever
A mother's hugs make you stay a while
There's no better gift than giving for her
or to see you smile

Tuesday, 5 March 2013

Curiosity Box for Mum


Hi Everyone
 Sue Here 


Today I have made a curiosity box for my mum.  You can adapt this by using your hougie board or going to the website The house of Zandra - www.houseofzandra.co.uk and purchasing the template.


The overall measurement of this box is 6ins width x 8 ins length x 1 ins tall and has 8 compartments and I used cosmic shimmer glue to stick it together.
I have used double sided cardstock, then cut some templates out for the background card I have placed at the rear of the little inner boxes.  I have then decorated with the following from J & C Creations website:

 
Bildmalarna 'friends on a log' stamp
Heartfelt Creations 'Tattered Collage' stamp
Distress Markers
Marianne Creatables LR0150
Spellbinder 'Wonderful Wings'
Cosmic Shimmer Glue
Glue Gun
Hot off the Press 12x12 colour me butterflies papers


Other items
Tim Holtz ChitChat words
Personal Impressions Lindsay Mason design stamps
Wooden heart embellishments
Tim Holtz clock pieces
Letter stamps


You can choose to add what words and images you wish from your stash or photographs but this is a lovely keepsake when finished.

 Hope I've inspired you just a little this week.
Sue.

Sunday, 24 February 2013

A sample of a sample

Hi Everyone
Sue Here


Today I have been mooching (or having a good nosey) in B & Q.  No I'm not a DIY buff but I pop in ever couple of months to see what new colour schemes, colour swatches and wallpaper samples are in stock.

 
Today I have used 2 of the wallpaper samples in my tag.  I only rip off 12 ins, just enough to make 2 cards or 4 tags out of, and don't forget you can always cover them in inks and paints to change them. 


I firstly covered the tag in the grey numbers sample, then went around the edges with distress inks and added a sentiment with Versamark and WOW ebony embossing powder.  I then die cut a  Marianne birdcage (LR0147) in green cardstock and added walnut stain to age it a bit.

I then cut out a butterfly from the 2nd sample of wallpaper and placed it in the cage.

I then added a sentiment 'Until you spread your wings you have no idea how far you'll fly.

Hope you fly far this week in your crafty experiments....Sue 

Friday, 22 February 2013

Lovin' Art

Hi Everyone
Sue Here

Today I'm going to show you a scrap canvas.  I love doing these, both as commissions and for family and friends.  They are sooo personal and can look fantastic on a wall or shelf as a 3d photo instead of a picture in a frame.  If you start off with the photo, then either work with the colours in the photo, favouriate colours of the receiver of the gift or if the photo is of a trip to a foreign place, say America, use the colours of the flag, adding favoriate embellishments, sayings, and all types of mixed media.  You'll be surprised what goes together.  Have fun.

My theme was L.O.V.E.  As you can see the photo does not have to be large.  Look out for offers on canvases or watercolour canvases in places like Hobbycraft, The Range, Home Bargins or the Pound Shop.  There are offers and sales on all the time and I tend to keep a few in stock and only buy them when they are.  Also look out at car boot sales (If you've not already gathered, I'm a sucker for them)as again you can pick up unwanted canvases and paints at low prices.


Here's how I achieved my look:
Materials used:
  1. Start off with the canvas.  Take tattered rose distress ink and put some on a craft mat and dilute with water.  With a brush put it around the edges of the canvas and pull into the middle of the canvas, leaving white areas.  Do the same with Victorian velvet which makes the background into a wash with a light tinge of pink/red. Lightly heat dry. You could achieve the same look with diluted water colour paints or acrylic paints
  2. Sponge some 'london fog' through the mask with holes in leaving dots in strategic places on your canvas.  Do not be particular about this, just let your creativity flow.  You can always add more later.Dry off with heat or leave to air dry.  Take an antistatic bag and brush lightly over the canvas.
  3.  I used the antistatic bag because I didn't want the embossing powder sticking to the distress ink washed background
  4. With the love heart mask, sponge clear embossing ink through some of the mask in the top right hand corner. Sprinkle pastel pink embossing powder over the hearts and heat set.
  5. Take the scalloped edge die and halve the circle once cut out.  Use over the wrought ironwork die on the right and under the lace on the left.
  6.  Print off the saying on white vellum and pour clear embossing powder over the words to raise them.. Heat set.
  7. Place a piece of ribbon down the right hand side of the canvas.  On this I placed a flower made up of 9 hearts from the gratitude set.  I used pomegranate embossing powder.
  8. I then placed 4 pieces of thin lace around the canvas.  I love using cosmic shimmer glue as it is very strong and will dry clear.
  9. On top of the lace I places two iron book binder posts one on each side.  Again I covered these in pomegranate embossing powder.
  10. I then embossed the call me words frame onto pink vellum with London fog ink and clear embossing powder, then cut it out.
  11. The two leave scrolls are from a memory box die in different coloured vellum.
  12. The love hearts are Marianne designs and here I have sprinkled different red and pink embossing powders on them to get the effects.
  13. The 'with love' ticket is from the gratitude set, then the 'with love' stamp is from the 'with love' set and is stamped separate onto card using sherbert embossing powder then cut to fit over the front of the ticket masking out the original word 'gratitude'.  I then coloured with distress ink and distressed it slightly with black distress ink.
  14. The lock is spellbinders and I lightly went over this in 'london fog'
  15. The frame around the couple and the buttons are pure white card made from spellbinders dies. 

Sunday, 3 February 2013

A Room with a View


Hi Everyone
Sue here
Scene-it Toppers
Today I have used the same Hobby Art stamps CS037D  and made this scene.

I firstly used white cardstock and stamped a scene.  As you can see I have used the same stamp a couple of times and masked areas.  If you find that the fields don't join together get a fine black liner pen and join them up and draw lines similar to the ones on the stamp.  Again a clever trick so you can join landscapes together. I coloured it in with distress markers.


I then die cut a Marianne Twig die and covered in versamark and heat set WOW Satin Pearl Embossing Powder.

Doesn't that view look peaceful and idyllic - makes me want a long week end in the lakes!


Peace to you all this week .......Sue

Monday, 17 December 2012

Christmas Table Decorations!

Good Morning!
Last week we had Christmas Tree Decorations and this week we have Table Decorations for those little finishing touches we all like to add to the Dining Table.
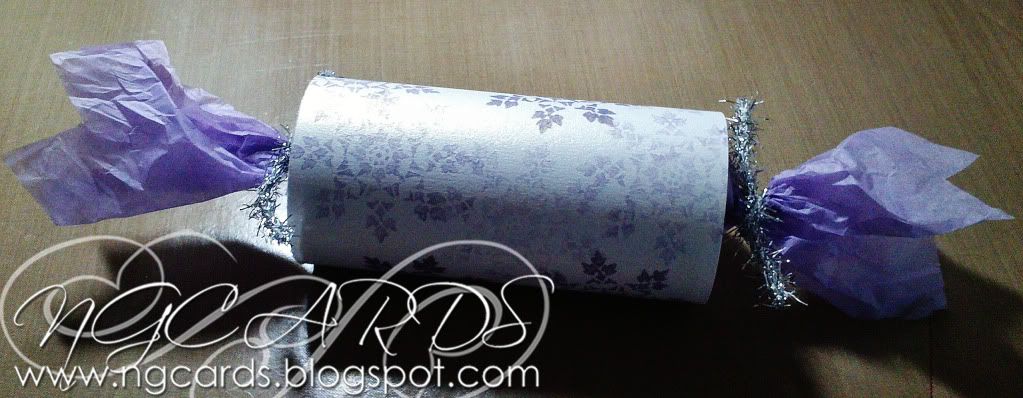
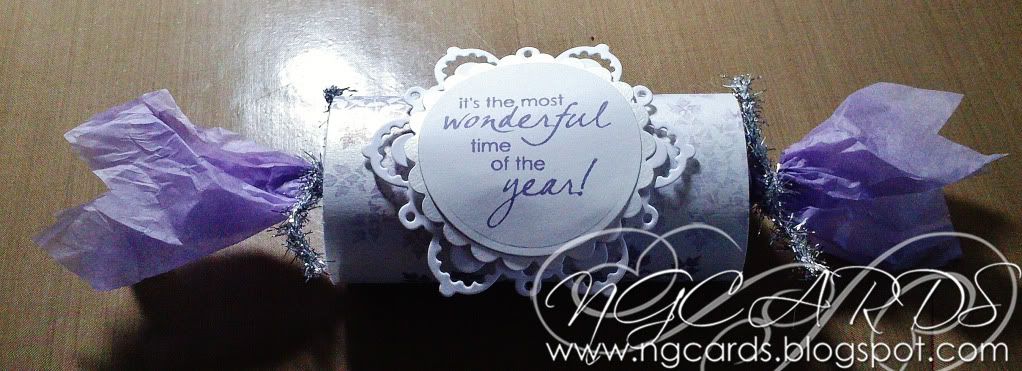
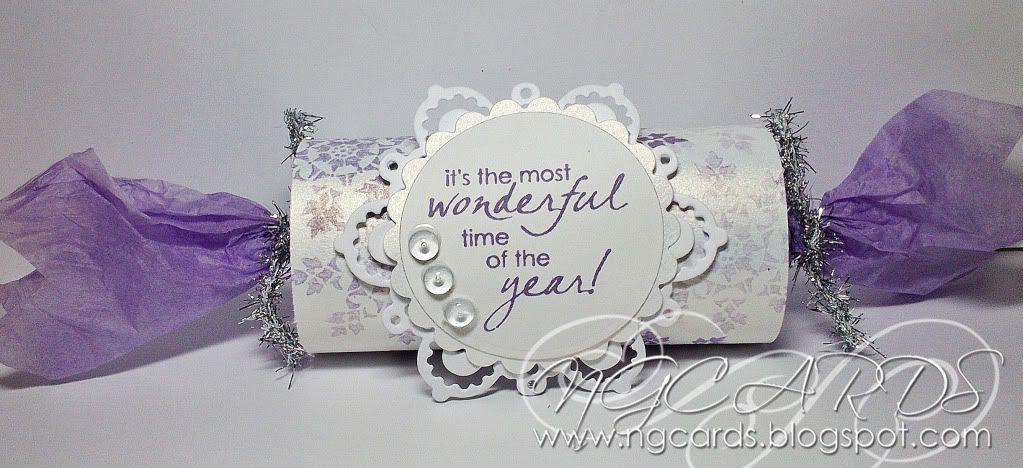
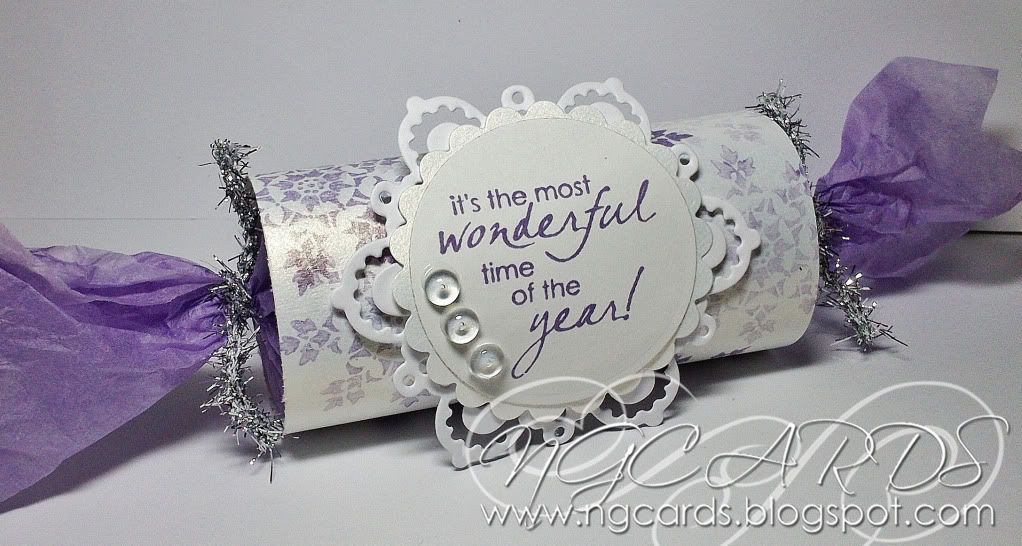
I'm starting this week off with a hand-made Cracker that you can fill with a treat of your own, my favourite thing to add is chocolate! However you could also leave the Cracker empty and simply use just as a decoration :)
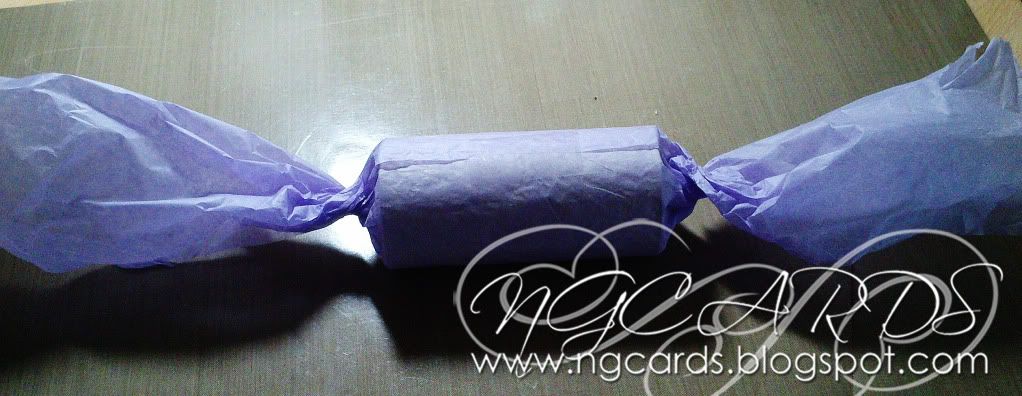
To create the Cracker all you need is a spare Toilet or Kitchen Roll, Tissue Paper & Iridescent Paper.
Wrap the Tissue Paper around the roll, twisting the edges and keep in place with some selloptape. 


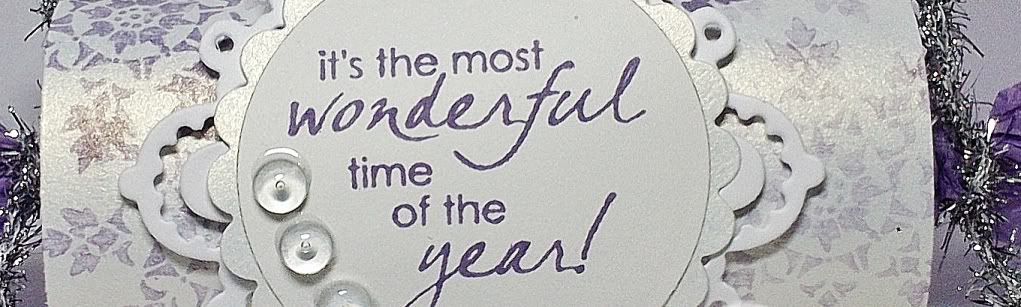
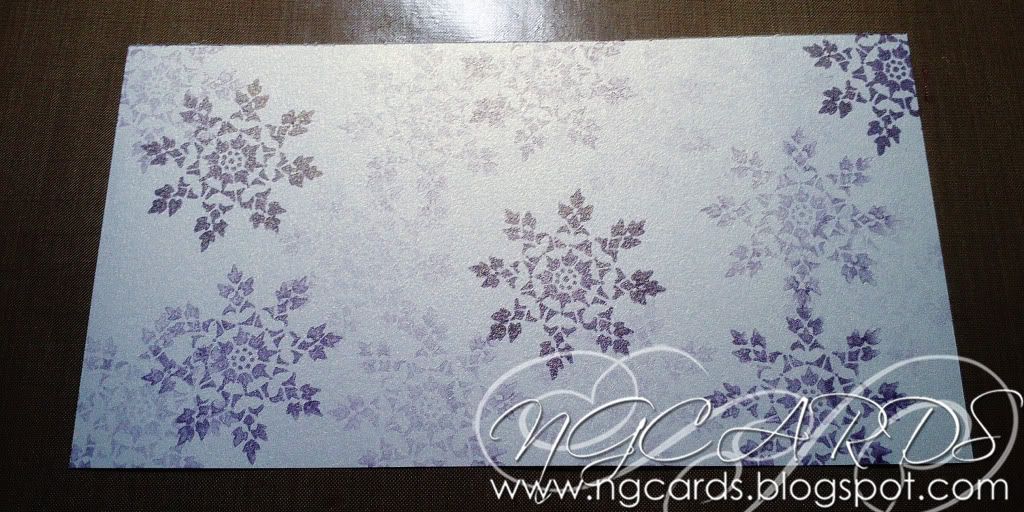
Trim the Iridescent Paper to fit the width of the centre and decorate. I have used some Archival Ink and a Rubber Stamp with the second generation technique (this is where you stamp your image 2 or 3 times before re-inking to create images with a different ink strength). When your happy with how it look secure this around the centre of the cracker and tie the end of the tissue paper with some Tinsel Twine.
Create a finishing touch of stamping a sentiment, cutting out with some Nesties and mounting onto a Snowflake Die-Cut. Secure this in the centre with some 3D Foam Pads. Embellish the sentiment with some clear Dew Drops.


INGREDIENTS -
Penny Black Stamps '...the most' and 'Brush Flake'
Toilet / Kitchen Roll
Iridescent Paper
Purple Tissue Paper
Marianne's Designs Snowflake Die
Tim Holtz Silver Tinsel Twine
Dew Drops & Ranger Glossy Accents

INKS USED -
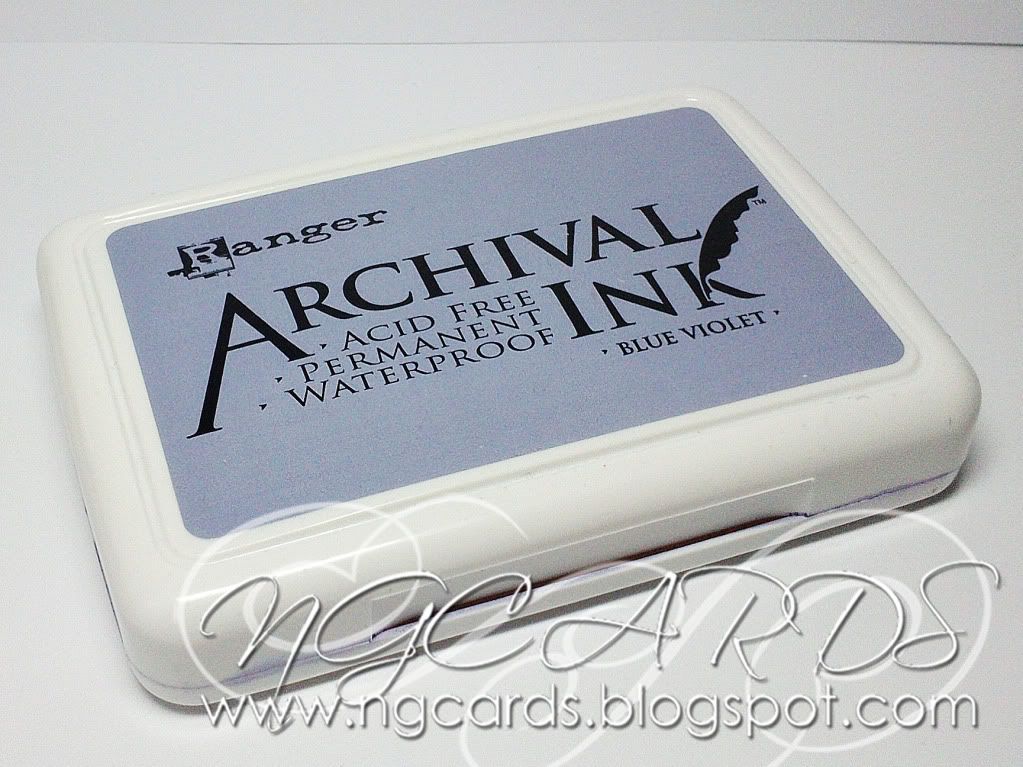
Archival Ink - Blue Violet

Thanks for popping by!
HAPPY CRAFTING!
NATALIE
XXX

Sunday, 16 December 2012

Baubleicious

Hi Everyone
Sue Here


My last post this week on making your own Christmas decorations.

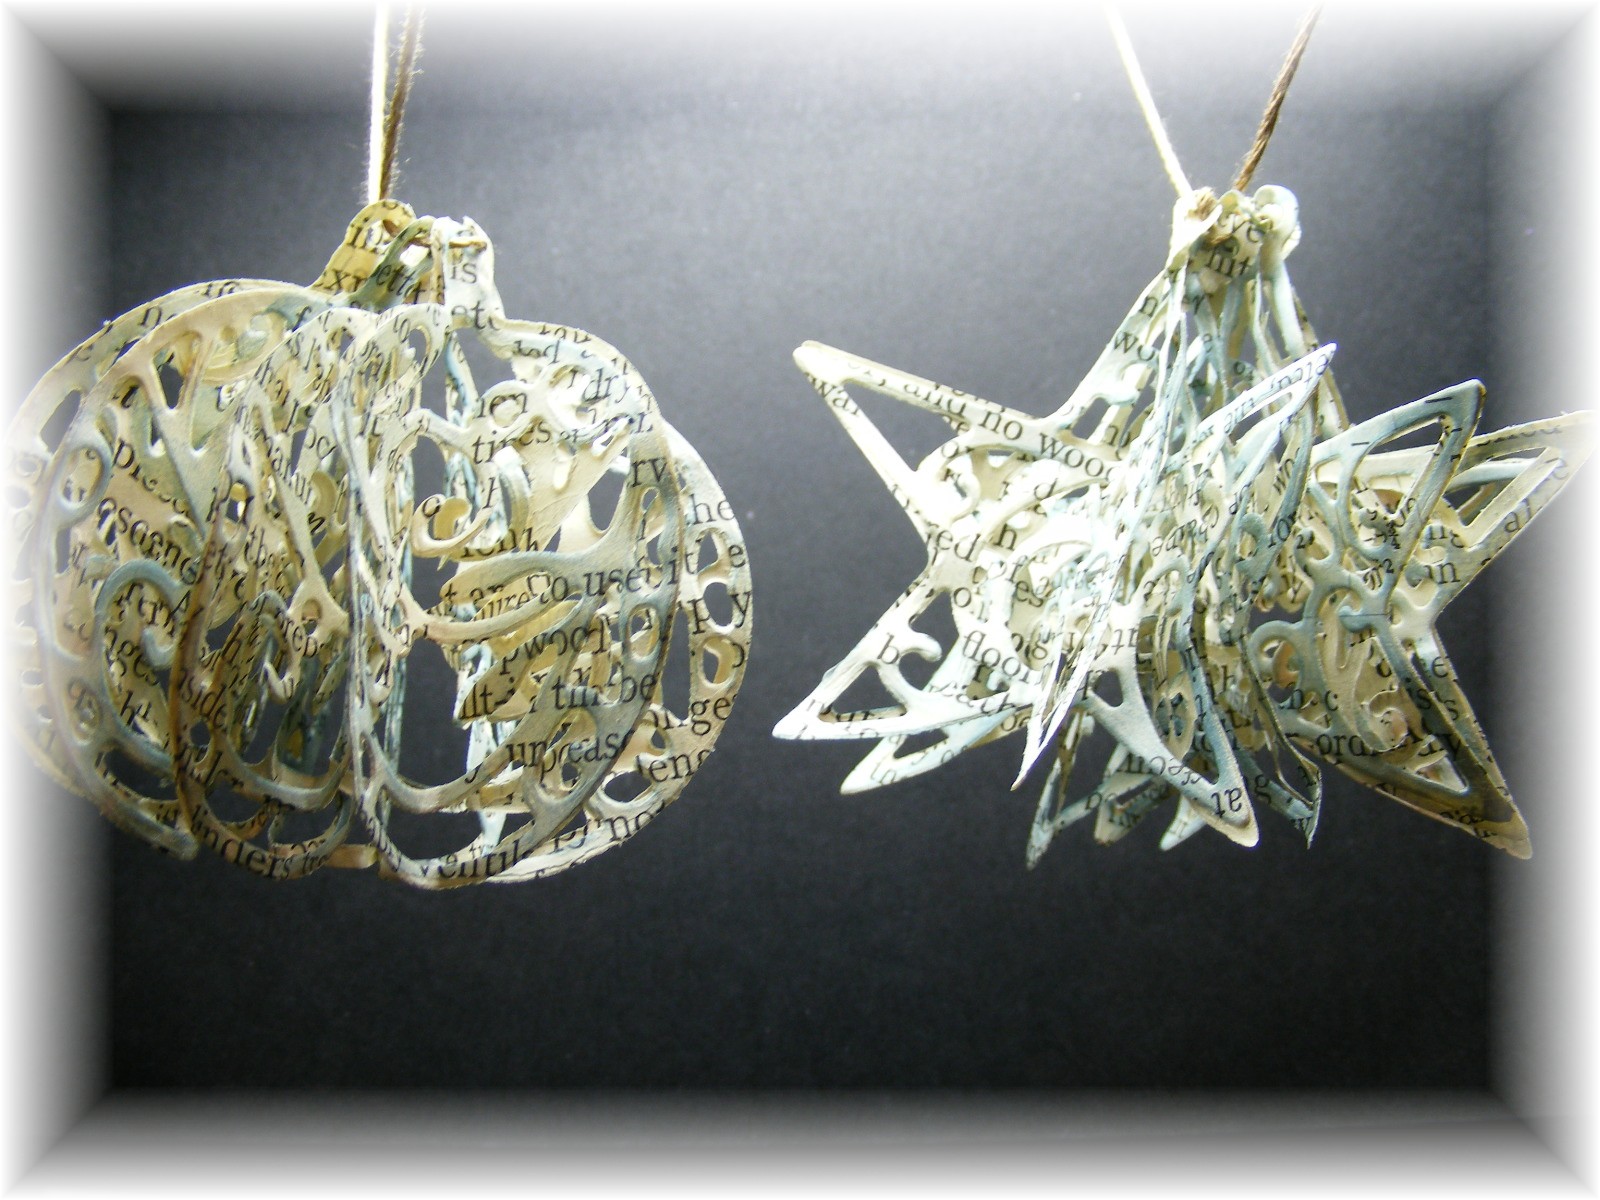
I have made these out of Marianne Creatables baubles LR0183 and some old book pages.  The book I got from a car book sale for 50 pence and is on joinery.

I have cut 12 baubles each and can be cut in 4's.  I have then gone around the edges with faded jeans distress ink and then folded them in half.

I then glued each half to another bauble half until all have been used, then the last and first bauble are glued together forming a round shape.

I have then put a piece of embroidery thread through the hole at the top of the bauble to gather it together.  You can always add glitter before you glue them together or spray stick and shine on them when fully complete.

Take care speak soon

Sue 

Monday, 3 December 2012

Crafty Gifts!

Good Morning!
Apologies for not popping by on Saturday like I usually do, I caught a rather nasty stomach bug last week so unfortunately I didn't manage to get all my crafting done :(
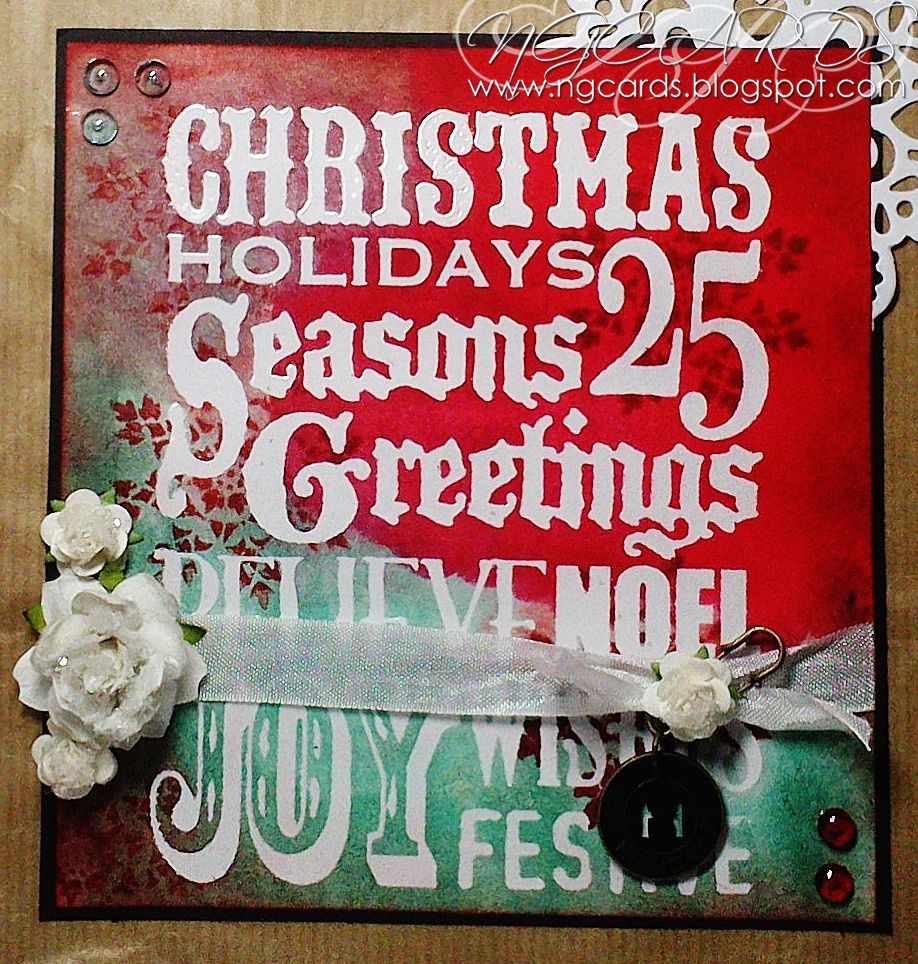
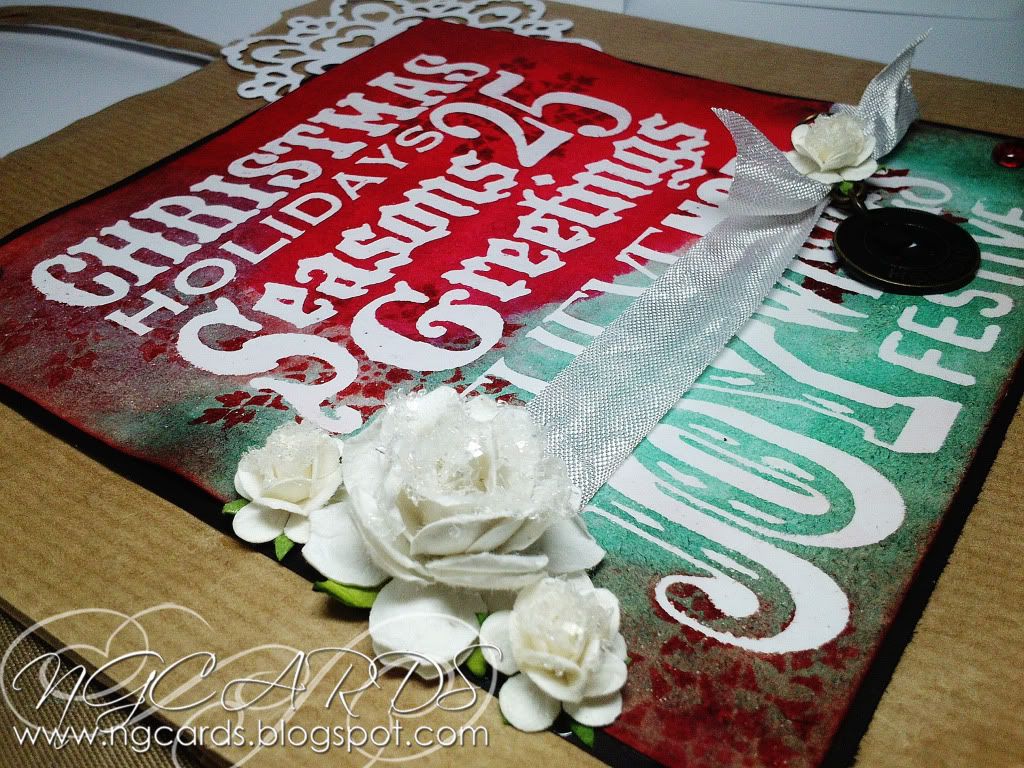
 However I am feeling much better now and I am back today with something to start off this weeks inspirational theme which is Crafty Gifts! What with Christmas just around the corner what better way could you give a gift to a loved one than placing it inside something that you had also made??? I have come up with something very quick and straight-forward for those of you who don't have time to spend too long on one thing but still making it look like you had ;) I have simply decorated a plain paper bag that can hold your present inside!

To create the bag simply flatten a brown paper bag so you have a flat surface to work on. 
Trim a piece of black cardstock down to a size just a little smaller than the bag itself, this will help the Design Paper that you will be creating to stand out to the eye just a little bit more from the bag.
Next ink up a large sentiment stamp, I have used one by Tim Holtz, using an Emboss It Ink Pad and stamp onto a piece of white cardstock trimmed just a bit smaller than the black. Sprinkle over some Clear Embossing Powder and heat up. 
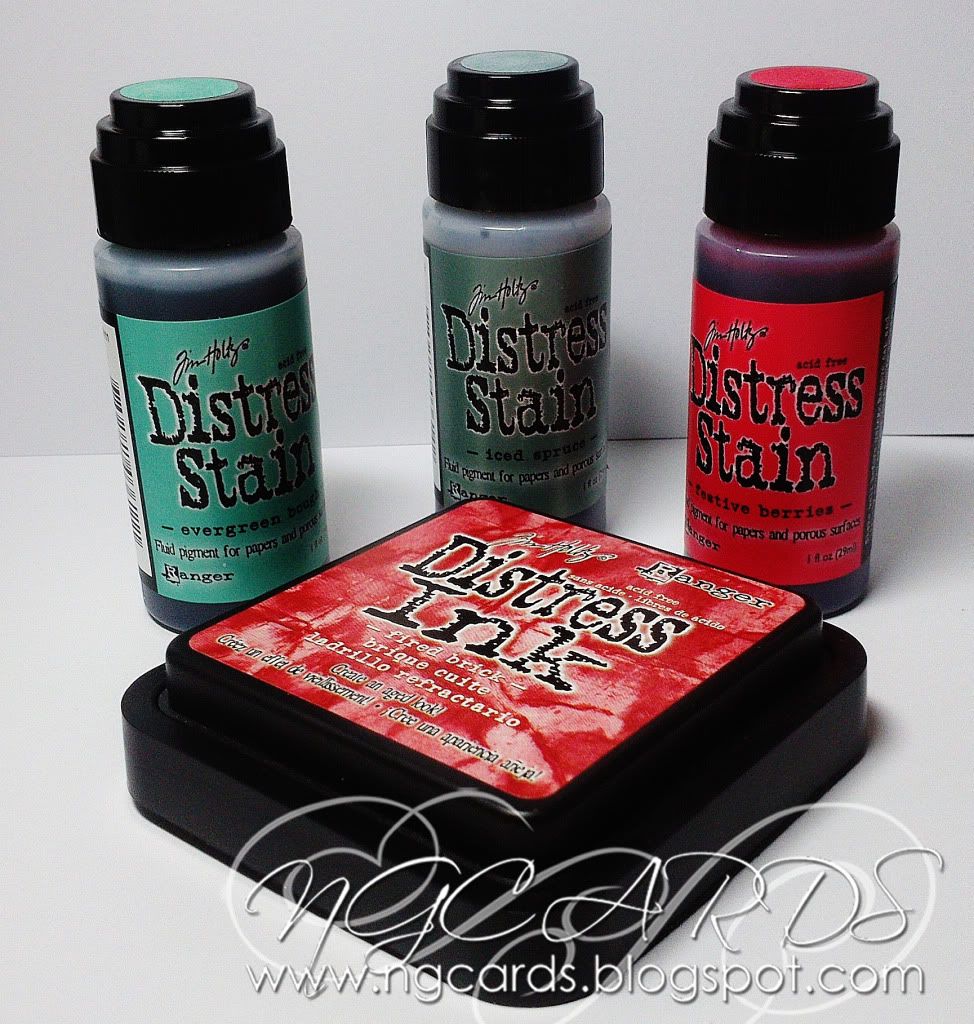
Once cooled spritz the card with some water and spread a combination of 3 Distress Stains over the top, don;t panic abojut covering the letter as it will simply wipe away once finished with a damp cloth. Heat dry and once your happy with the background stamp over the top with a Snowflake Stamp using Distress Ink.
Heat dry once again and wipe away the excess ink with a damp cloth from the lettering, once you have done this you will see how the white really pops from the colours of the stains!
Die cut a snowflake design and place this underneath the cardstock on an angle at the top, wrap some ribbon across the lower half and secure using sellotape before glueing it all down. 
Finish the bag by adding some embellishments!


INGREDIENTS -
Tim Holtz Christmas Silhouettes Stamp Set
Penny Black Brush Flake 2783F Stamp
Brown Paper Bag
Marianne's Designs Snowflake Die
Flowers
Foundations Black Cardstock
Seam Binding Ribbon & Twinklets Glitter
Dew Drops
Clear Embossing Powder
Tim Holtz Ideo-ology Christmas Muse Token, Wire Pin & Jump Ring


INKS USED -
Distress Ink - Fired Brick
Distress Stain - Iced Spruce, Evergreen Bough & Festive Berries

Thanks for popping by!
I shall be back on Wednesday with my take on the Tim Holtz December Tag to share with you all!
HAPPY CRAFTING!
NATALIE
XXX