Craftsuprint - The Worlds Largest Legal Craft Download Site!
Showing posts with label Penny Black. Show all posts

Tuesday, 2 July 2013

CAS Butterfly

It’s Tuesday and I’m back to share another card with you made from products from the J & C Creations shop. This rather gorgeous Penny Black stamp is so pretty that I decided piling on the embellishments (as I’m wont to do!) would be unnecessary, the focus should be be the butterfly, don’t you agree? So I’ve left my card Clean & Simple and let the image do the talking! If you pop over to the shop there is a fantastic 25% off this stamp at the moment along with lots more bargains to be had.


Products from J & C Creations shop
Penny Black Slapstick/cling stamp - ‘Soft Wings’ 
Tim Holtz distress ink pad - ‘Victorian Velvet’
Ribbon
Pearls 
Cosmic Shimmer embossing powder - ‘True White’
Dies used: Spellbinders ‘Ovals’ & ‘Floral Ovals’

Natx


Thursday, 20 June 2013

J & C Creations Open Day!

Hi everyone

Just a quick reminder that we have our Make & Take Day this Saturday 22nd June
at our warehouse.  We will be open between 10am and 4pm

Learn how to make a Summer mechanical card with floral stamps, memento inks and embellishments.  Further details can be found on our website  HERE.


Also, why not learn how to make Memory Wire Bracelets at our next workshop on Tuesday 25th June
  Further information can be found HERE


We hope you can join us and look forward to seeing you

Sue

Monday, 3 June 2013

Hi Guys,

I thought I would drop you a quick message to let you all know that this month we are sponsoring the Penny Black Saturday Challenge Blog! So if you would like the chance to win a £10 gift voucher to spend at J & C Creations then pop over and take a look. I have included a few details and a link to the blog below.


The theme of our challenge this month is:

'Masculine'

With Father's Day later this month, we thought it was about time we turned our attentions to the men in our lives!
The challenge will close at 8pm on Friday 5th July.
And here are a couple of the gorgeous cards to inspire you from their lovely design team:  


Don't forget to check out our amazing offers on Penny Black stamps on our website!
We are currently offering upto 40% off Penny Black Stamps at J & C Creations

Jen
-x-

Monday, 13 May 2013

In The Pink!


Good Morning!
Today I am sharing with you a quick tag for this week's theme which is simply to use the colour Pink! 
I have covered a Manilla Tag with Distress Paints and inked around the edges. Stamped a floral design to create a background over the tag and another centre stamp with a white ink pad. Embellishing the tag with ribbon, flowers, dew drops and sentiments!


INGREDIENTS -
Penny Black 'Blush' Stamp
Heartfelt Creations 'Tattered Blossoms' Stamp Set
Tim Holtz Word Stickers
Flowers from WOC
Ribbon, Dew Drops & Glitter
Ranger Glossy Accents


INKS USED -
Stampin' Up White In Pad
Distress Ink - Picked Raspberry & Vintage Photo
Distress Paints - Victorian Velvet & Picked Raspberry

Thanks for popping by,
NATALIE
XXX

Sunday, 28 April 2013

Faux Layers

Hi Everyone
Sue Here


My submission today is a hot topic in the card making world.  How to make layers for a card without making layers?  In other words the card looks like it has layers but is in fact flat.

I firstly used the new Heartfelt Creations backing papers and ran this through a diamond embossing folder and highlighted the raised area with stormy sky distress ink.  I did the same with a plain piece of cardstock for the bottom of the card.

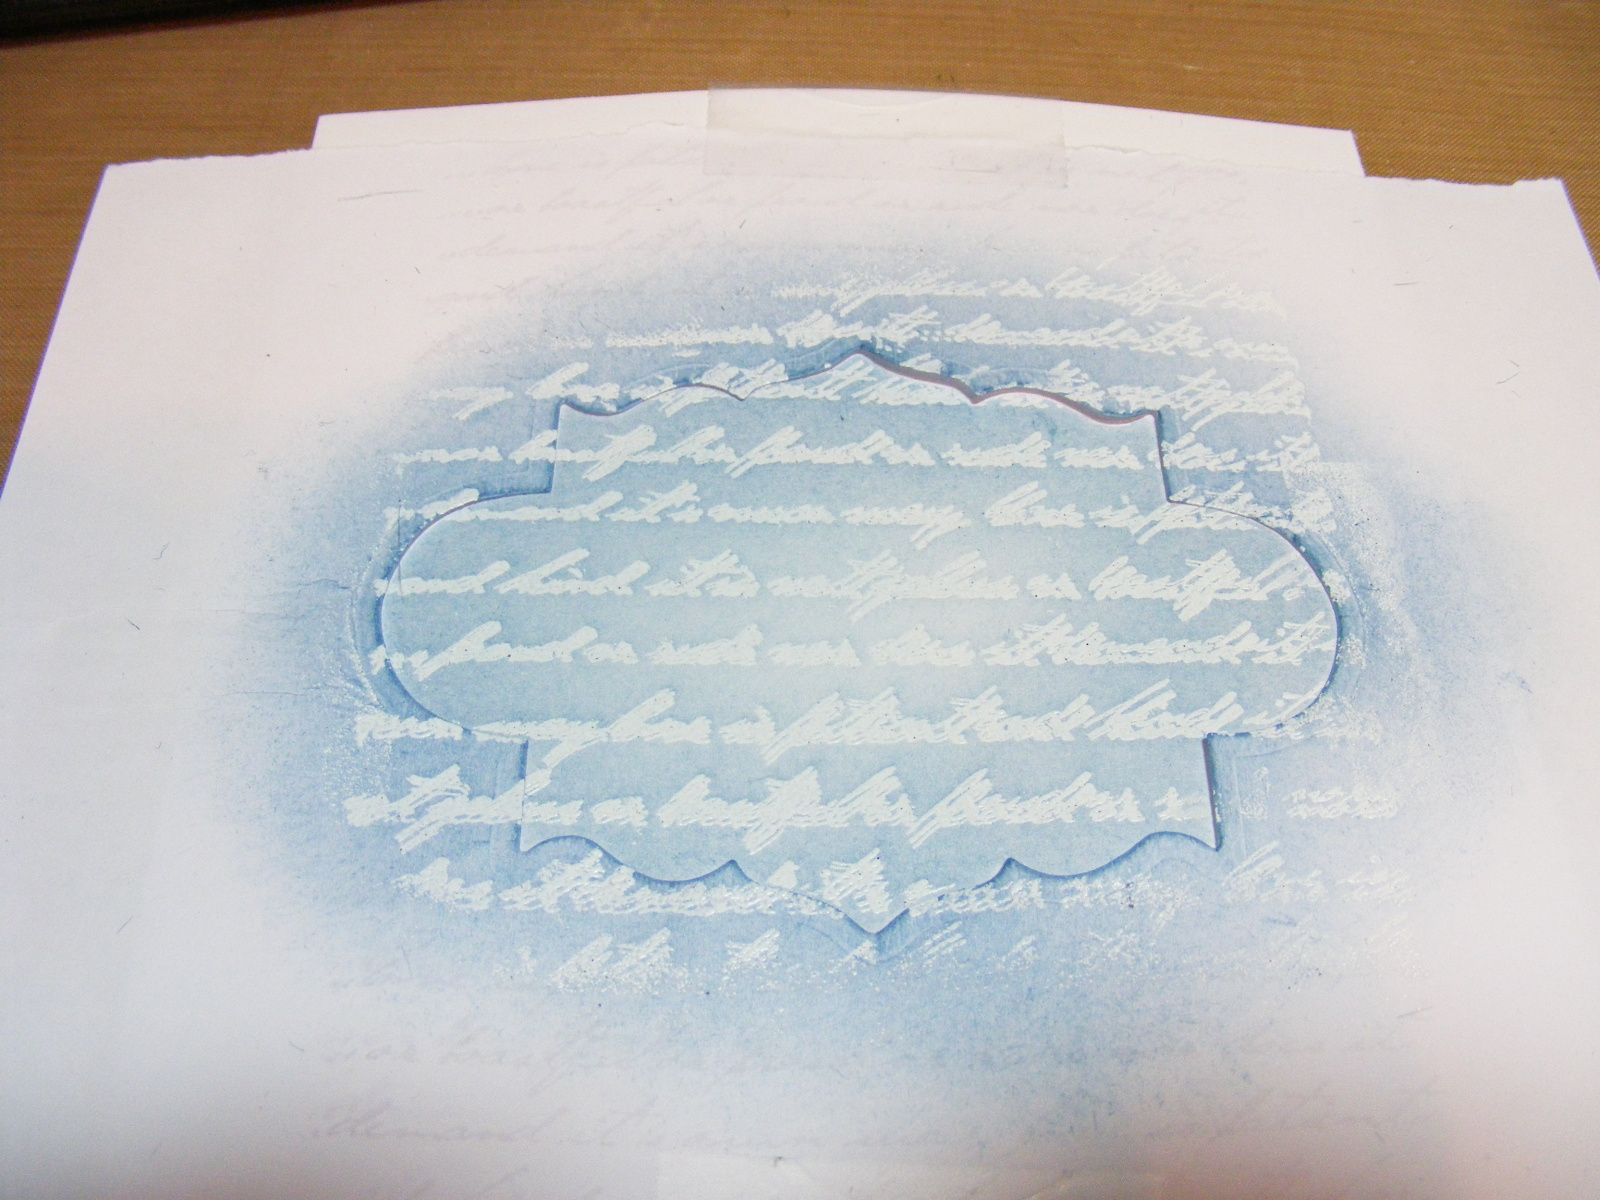
On a white piece of copy paper, I cut out the 2nd largest Spellbinder label 30 and placed the aperture part on the card.  I then used the Heartfelt Creations large elegant word stamp with Versamark, stamped through the aperture and then heat set with white WOW embossing powder.  I then used a stippling brush and the stormy sky distress ink and inked the aperture leaving the shape of label 30.  (I used a stippling brush as a normal blending tool or cut and dry would leave marks on the edges).  There will be a resist where the script has been stamped.

I then stamped Penny Black Flying Stars in Stazon over the script and shape.  Here I used a stamp positioner so that I got the stamp in the exact spot I wanted on the card.  I then cut the card and added a Martha Stuart punch to the edges.


I then cut  a Spellbinder d-lites whimsical tree out and used this as a flourish behind the Spellbinder d-lites medallion four put together as a flower, by cutting out 3 medallions from the Heartfelt Creations cardstock inked with stormy sky distress ink.  The centre is a brad.  The wrap at the bottom of the card is a new one by Sizzix.  The pearls are J & C Creations and the sentiment is from the Heartfelt Creations backing papers.


Try this out with your different spellbinders and see what fab backgrounds you can get to give your stamps a new lease of life.

Take care ......Sue 

Monday, 1 April 2013

April Blooming Flowers!

Good Morning!
I hope you are all enjoying your Easter Bank Holiday! Today I have a card to share with you that is made from using Acetate. Acetate isn't something that you would normally use for your card blank but I think it looks really clean and effective.
To create your card blank cut a strip of acetate and then fold in half using a bone folder. I have decided to use a patterned acetate but the normal clear acetate looks just as good.


To decorate the acetate I attached everything to the base using Glossy Accents as I found that it would hold everything much better than other adhesives. To make it possible to write inside the card I repeated cutting some cardstock like I did for my main image and stuck it inside directly beneath where the image on the top lays.


INGREDIENTS -
PB 'Sunflower' Cling Stamp
Oval Classic & Scallop Nestabilities
Tim Holtz Word Stickers
Papermania Acetate
Flowers, Dew Drops & Glitter
Ranger Glossy Accents


INKS USED -
Distress Markers - Shabby Shutters, Peeled Paint, Worn Lipstick & Spun Sugar

Thanks for popping by,
HAPPY CRAFTING!
NATALIE
XXX

Monday, 25 March 2013

Spring Florals!

Good Morning!
Even though in many parts of the UK right now we are knee deep in snow it is actually officially spring! So with that said today's card is is celebrating that and ignoring all the cold and snowy weather outside! lol
The main image is a gorgeous stamp by Penny Black called 'Bliss 4044K' and I have simply coloured directly onto the stamp using Distress Markers.


After leaving the image to dry I layered up my card like I normally do (you can see the process in last monday's post) and of course added my usual embellishments!


INGREDIENTS -
Penny Black 'Bliss 4044K' Stamp
Penny Black 'Great Day 3419D' Stamp
LOTV Nitwits Papers
Classic & Scallop Oval Nestabilities
Flowers, Ribbon, Cheesecloth, Flower Charm, Dew Drops & Glitter
Ranger Glossy Accents, PVA Glue & Liquid Pearls - Bisque


INKS USED -
Distress Markers - Peeled Paint, Weathered Wood & Faded Jeans

Thanks for popping by!
HAPPY CRAFTING!
NATALIE
XXX

Saturday, 16 March 2013

Masking Once More with Penny Black!

Good Morning!
First off I have to apologise, I had planned to share something completely different and more advanced with you all today but unfortunately that wasn't to be! I managed to catch a nasty bug that has been going around on Tuesday and after 4 days of putting up with it at work by the time I went to go craft last night I just didn't feel well enough. So I am afraid that today's card is rather quick, clean & simple using the same stamp set as on Monday!
As you know the card on Monday used the Masking Technique and today's is exactly the same! I stamped the Black & White flower first and then used the flower stamp that was the next size down along with the same 'Mask' from Monday.


INGREDIENTS -
Penny Black T-Set 'Petal Party'
Penny Black '365 Days' Rubber Stamp
Dew Drops


INKS USED -
Archival Ink - Jet Black
Distress Ink - Bundled Sage, Spun Sugar & Milled Lavender

Thanks for popping by,
HAPPY CRAFTING!
NATALIE
XXX

Friday, 15 March 2013

A masking in the Jungle!

Hi Everyone
Sue Here


My last post of the week on masking and this time I have given it a jungle theme.

I firstly die cut some Tim Holtz tattered florals and leaves out of old envelopes and stuck these onto the Ranger 12 ins. tag.  I have chosen the colours of peeled paint  and evergreen bough distress stains inked over the die cuts.

I then put picket fence distress stain in areas on the tag to give it a 'foggy' look and rubbed this in with my finger.  I then left it to dry for 30 mins then with a  peeled paint re-inker I painted over the raised flowers and leaves which gave it the effects you can see, underneath some of the die cuts is picket fence, which gives the re-inker an eery look.  I like it!

I then went around the edge of the tag in black soot distress ink.


I then got a countryside mask and put versamark through it with a piece of cut and dry foam and then sprinkled WOW ebony embossing powder over this.  Don't forget if you miss any areas you can always go back with an embossing pen and colour in the missing areas.  I then heat set.


Finally adding some embellishments from Tim Holtz, a charm from an old bracelet, a sentiment from Penny Black 'Salutations' and ribbon.
All highlighted items can be purchased from J & C Creations.

Hope you have enjoyed masking this week.

Thursday, 7 March 2013

Background Dimensions

 Hi Everyone
Sue Here


The other day I came across a video on Heather Telford's website on backgrounds and so I have made this Mothers Day card with the technique in mind.


Items used from J & C Creations:
Penny Black Transparent 'salutations' stamps
Penny black wooden background stamp 'Paisley Border'
Heartfelt Creations 'Large Elegant Words' stamp
Memento ink pads in pink, green and red
Distress Marker in Pink

Other items:
Peel Off dots and lines 

I firstly used post it notes and masked off a section of the front of the card.  I then inked up the paisley stamp in pink, then added on the top a distress marker to highlight the flowers and stamped it in between the post it notes. I then inked up in grey the word stamp and put this on each side of the border.

I then used a peel off border.  I then stamped out a flower and vase and decoupaged it to the front of the card.  I then stamped 'enjoy'. 

'Enjoy' your crafting time...Sue


Sunday, 17 February 2013

Random Act of Kindness Day


Random Acts of Kindness Day is the name of an unofficial holiday increasingly celebrated around the world, in order to encourage acts of kindness and challenge everyone to do something kind to a friend or stranger for no reason at all.

I have used  from J & C Creations - the Penny Black 'Gratitude' stamp set, the colour me butterflies hot off the press 12x12 backing papers for the banner, the Tim Holtz rosette, Spellbinders scallop rectangle and backing papers from home.I have inked this up with memento pistachio ink.

What will your random act of kindness be!  Take care - Sue

Monday, 4 February 2013

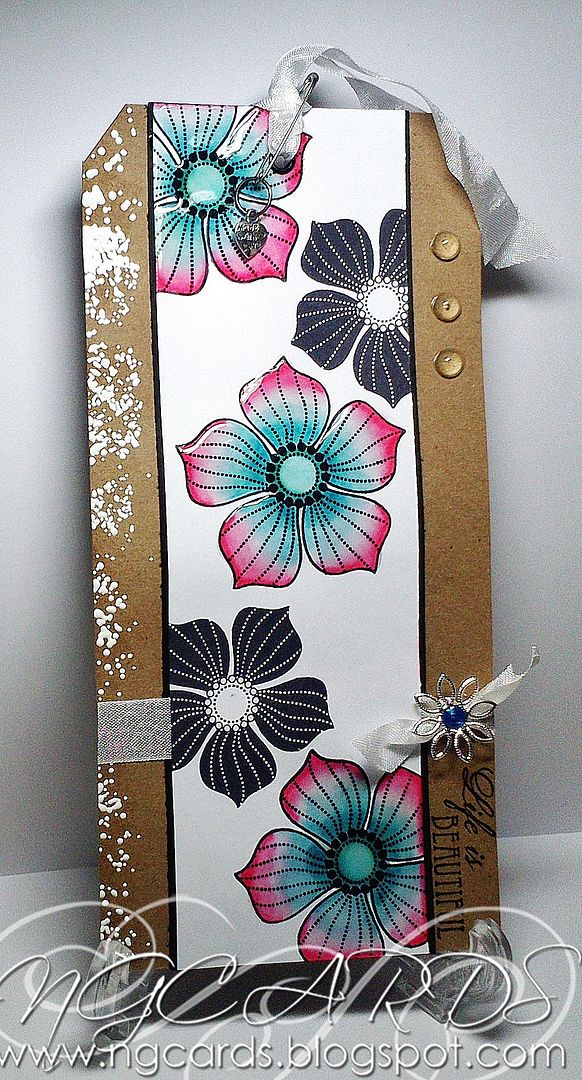
Life is Beautiful!

Good Morning!
This month we shall be moving on from focusing on certain brands and moving more towards different craft basics and showing how versatile they can be! This week me and Sue will be focusing on Ranger Tags in various sizes! These tags come in a selection of Manilla, Kraft & Black in 3 different sizes. However they are also available in larger sizes and today I am using one of those, the #10 in Kraft.
I wanted to make a tag that was quite straight forward to those of you that are new to them!


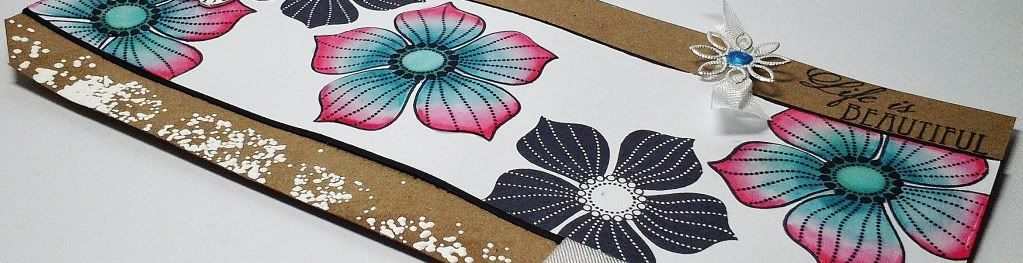
To create my tag I cut a strip of white card that fit in the centre of the tag and mounted it onto some black, with only the sides of the black showing.  Before glueing together I stamped two flowers from the Penny Black Set 'Petal Party' down the white card in varied positions. I coloured the flowers in using 3 different Distress Markers and a Water Brush. Once complete I glued the pieces of card together with a strip of ribbon in-between then onto the tag, punching through the hole at the top again using a Crop-a-Dile. Next I added some Glossy Accents over the top of the flowers to give them some more definition and left to dry.

Once the Glossy Accents had set I tied the ends of the ribbon around the back of the tag fixing down with some tape. I then tied a bow through the strip on the right with another piece of ribbon and attached a Metal Charm with Glossy Accents in the centre, finishing with Liquid Pearls.
Using the Sentiment from the Stamp Set I stamped it down the bottom right of the tag and fixed some Dew Drops at the top. To make the left side of the tag different I pressed an Emboss It Ink Pad all down the side and sprinkled some White Chunky Embossing Powder by Stampendous on top.
To complete the tag I threaded some more ribbon through the top and attached a safety pin and charm through the centre.


INGREDIENTS -
Ranger Kraft Tag #10
Penny Black 'Petal Party' Stamp Set
White Chunky Embossing Powder by Stampendous
Crop - a - Dile
Seam Binding Ribbon, Flower Charm, Safety Pin & Heart Cham
Liquid Pearls - Ocean Blue & Ranger Glossy Accents


INKS USED -
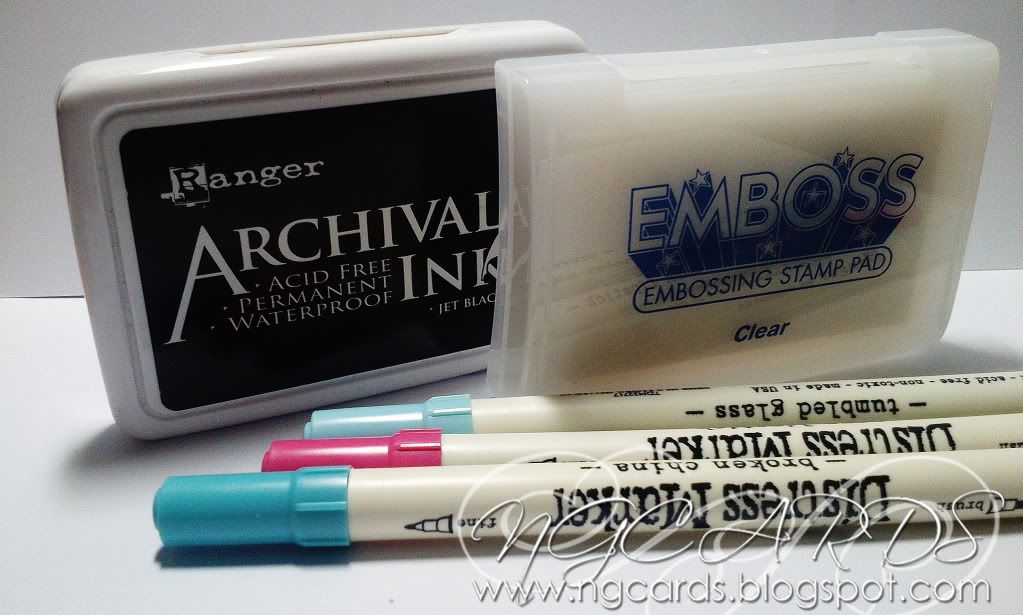
Emboss It Ink Pad & Archival Ink - Jet Black
Distress Markers - Tumbled Glass, Broken China & Worn Lipstick

Thanks for popping by, I'l be back on Saturday!
HAPPY CRAFTING!
NATALIE
XXX