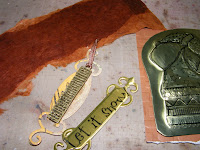
My project today is using craft metal. I love this product and with a few embossing tools you can create some stunning patterns on the surface. If you haven't got any craft metal very thick foil can act as a good substitute but it must be thick.
Penny Black Antique Santa
Distress ink in vintage photo
Spellbinder fancy tags
Pinflair Glue
Stazon Ink in Black
Glossy Accents/Filler paste
Carolling Penguins Penny Black Stamp
Craft metal
Backing paper
Ribbon
Gold mirri card
Brown Mulberry paper
Brown cardstock run through a brick embossing folder
Embellishments
1. Get the craft metal and stamp the Santa in black. Take a thin embossing tool and trace around the outside of the Santa. Turn this over and on the back with a thick embossing tool (and a mouse mat/pricking mat underneath) gently push the metal out inside the outline.
Another good tool to have is a metal texturing tool which looks like a soft pointed rolling pin and is rubbery.
 You can add patterns and dots with embossing tools into the metal - revers side so it pushes out. Cut the stamped image out.
Fill the back of the metal where there are indentations with either glossy accents or filler paste. Leave to dry.

 2. Get a piece of cardstock and run through a brick embossing folder. Tear the lower side and ink the edges. Stick the Santa to this.
3. Die cut 2 tags one I have used in mirri card the other in a decorative background glitter card.
4. Glue an embellishment to one of the tags. The other, stamp in Stazon, the sentiment from the caroling penguins set.
5. Get a piece of mulberry paper and with a paint brush wet along the side and then tear the paper, making it feather.
6. Attach a piece of ribbon to the mulberry paper.
7. Glue everything down with Pinflair.
Hope you enjoy making this card as much as I did.
Take care, Sue


No comments:
Post a Comment