Hi Everyone
Sue Here
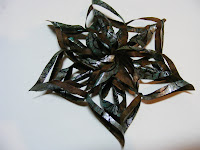
Today we are making paper snowflakes. I came across these on a really good website
and this is the small template I used.
I have made one with a J & C twist, using copy paper.
1. Download the large snowflake template or small snowflake template. Print enough pages so you'll have 6 squares (1 or 2 sheets, depending on which template you chose). Cut along the inner lines with an X-acto knife and then cut out the squares.
3. Moving outward from the center, bend the next pair of flaps around in the opposite direction until they meet. Overlap ends and secure with double-stick tape.
4. Repeat with the next pair of flaps, bending them in the opposite direction. Do the same for each concentric pair of flaps, alternating directions each time and taping ends together. Continue on to the remaining 5 squares, making the snowflake parts the same way you did the first one.
5. Tape all 6 points together to form a snowflake.
To make the J & C Creations one I firstly printed out the template then on the reverse I sprayed cosmic shimmer blue an silver colours on the paper and left it to dry.
Then on the template side coloured it in with gathered twigs distress ink.
I then turned it back over and stamped the heartfelt Creations Rye Grass stamp in versamark and used WOW ebony embossing powder and heat set.
Then using the template cut out the squares and lines and fold as instructed.
After gluing all six together I got my snowflake. FAB.....
Thanks to Jessica Jones for sharing her great snowflake. Take care, Sue


No comments:
Post a Comment